(English) How to build a Docker Liferay 7.2 image with the Oracle Database support
On June 27th I published the update for Oracle database support for Liferay 7.2 Community Edition. In this article I will show you how to build the Liferay 7.2 Docker image by adding support to the Oracle database. In particular I will explain how to do it using Blade CLI and the Liferay Workspace.
Liferay provides Docker images for
You can pull Liferay’s Docker images from those resources and manage them yourself. Liferay Workspace, however, provides an easy way to integrate Docker development into your existing development workflow with preconfigured Gradle tasks.
This article was born as an extension of the one published by David H Nebinger Building Customized Liferay Docker Images.
The source code of the Liferay Workspace it’s available on this GitHub repository liferay-72-oracledb-docker-images
1. What are the requirements
Before proceeding with the construction of the Docker image, the following requirements must be met.
- Installation or upgrade to the latest version of Blade;
- Docker Engine 18.x,19.x;
- An instance of an Oracle 12c Release 2 database.
For the installation and updating of Blade CLI you could refer to this official Liferay documentation: Installing Blade CLI and Updating Blade CLI. The latest version is 3.7.4.201907232127. You can use this command blade version for checking your version.
Regarding the version of Docker I used both the version 18.09.8 and the 19.03.1. You can check your version with the docker version command. If you do not have an Oracle 12c Release 2 instance ready for use, you might consider using this official Oracle Database 12c Enterprise Edition Docker image. This image is the one I usually use.
2. Create the Liferay Workspace and Dockerfile
First of all we have to worry about creating the Liferay Workspace that we will use in order to configure and build our docker image. Let’s proceed in this way to create the Liferay Workspace.
$ blade init -v 7.2 liferay-72-oracledb-docker-images
$ cd liferay-72-oracledb-docker-images
$ blade gw createDockerfile
The first command initializes the Liferay Workspace while the last command using the Gradle createDockerfile task that creates the Dockerfile. The Gradle task execution creates a new directory structure and the Dockerfile. The new directory structure and file created is shown below (command tree -L 3 build).
build
└── docker
    ├── Dockerfile
    ├── deploy
    └── files
The created Dockerfile is not good because it contains the reference to the base image of Liferay 7.1. We instead need version 7.2 of Liferay.
FROM liferay/portal:7.1.1-ga2
COPY --chown=liferay:liferay deploy /etc/liferay/mount/deploy
COPY --chown=liferay:liferay files /etc/liferay/mount/files
In order for the Dockerfile to be created with the correct version of the Liferay image, the following content must be inserted in the gradle-local.properties file. The specific image has been set on the liferay.workspace.docker.image.liferay property. To find the possible property values you can set, see the official Liferay Portal Docker Hub’s Tags section (e.g., Liferay Portal Docker Tags). In our case we want to get the version 7.2 GA1 of Liferay Portal: liferay/portal:7.2.0-ga1
#
# Set the Liferay Portal Docker image to create your container from. The
# default value points to Liferay Portal CE 7.2 GA1.
#
# I could easily swing out to https://hub.docker.com/r/liferay/portal/tags
# to find that there is an updated tag
#
liferay.workspace.docker.image.liferay=liferay/portal:7.2.0-ga1
At this point we re-launch the Gradle createDockerfile task to recreate the new Dockerfile. Now the FROM directive of the Dockerfile contains the correct version of the image.
FROM liferay/portal:7.2.0-ga1
COPY --chown=liferay:liferay deploy /etc/liferay/mount/deploy
COPY --chown=liferay:liferay files /etc/liferay/mount/files
Before proceeding further, you need to update the version of com.liferay.gradle.plugins.workspace from 2.0.4 to 2.1.3. The change must be made to the settings.gradle file.
buildscript {
        dependencies {
                classpath group: "com.liferay", name: "com.liferay.gradle.plugins.workspace", version: "2.1.3"
                classpath group: "net.saliman", name: "gradle-properties-plugin", version: "1.4.6"
        }

        repositories {
                maven {
                        url "https://repository-cdn.liferay.com/nexus/content/groups/public"
                }
        }
}

apply plugin: "net.saliman.properties"
apply plugin: "com.liferay.workspace"
3. Docker image configuration
Now all that remains to do is configure our personalized image of Liferay 7.2 so that it is able to connect to an oracle database.
The configs/docker folder is where your configuration and overlay files for your Docker image. You’ll put files here such as your portal-ext.properties file, your osgi/configs files, overrides for the tomcat-9.0.x files (where x is going to be the version of tomcat included in the bundle), etc.
What do you need for configuring the new image?
- JDBC Driver for Oracle Database 12.2.0.1 (download from jdbc-ucp);
- Liferay Portal Database All-in-One support (download from Maven Repository);
- Configuring the connection to the Oracle database via portal-ext.properties
The commands shown below do:
- The creation of the portal-ext.properties file whose content is shown below;
- The creation of the directory configs/docker/tomcat/lib/ext where the Oracle JDBC driver will be installed;
- The creation of the directory configs/docker/tomcat/webapps/ROOT/WEB-INF/lib where the Liferay driver will be installed for Oracle database support;
- The copy of the driver liferay-portal-database-all-in-one-support in configs/docker/tomcat/webapps/ROOT/WEB-INF/lib.
$ touch configs/docker/portal-ext.properties
$ mkdir -p configs/docker/tomcat/lib/ext
$ mkdir -p configs/docker/tomcat/webapps/ROOT/WEB-INF/lib
$ curl https://repo1.maven.org/maven2/it/dontesta/labs/liferay/portal/db/liferay-portal-database-all-in-one-support/1.1.3/liferay-portal-database-all-in-one-support-1.1.3.jar -o configs/docker/tomcat/webapps/ROOT/WEB-INF/lib/liferay-portal-database-all-in-one-support-1.1.3.jar
The portal-ext.properties file you see, configuring the JDBC connection to the Oracle database also enables access to the GogoShell.
##
## JDBC
##
    #
    # Set the JNDI name to lookup the JDBC data source. If none is set,
    # then the portal will attempt to create the JDBC data source based on the
    # properties prefixed with "jdbc.default.".
    #
    #jdbc.default.jndi.name=jdbc/LiferayPool

    #
    # Set the properties used to create the JDBC data source. These properties
    # will only be read if the property "jdbc.default.jndi.name" is not set.
    #
    # The default settings are configured for an in-memory database called
    # Hypersonic that is not recommended for production use. Please change the
    # properties to use another database.
    #
    # Add dynamic-data-source-spring.xml to the property "spring.configs" to
    # configure the portal to use one database cluster for read calls and
    # another database cluster for write calls. The convention is to create a
    # set of properties prefixed with "jdbc.read." to handle read calls and
    # another set of properties prefixed with "jdbc.write." to handle write
    # calls. These data sources can also be created via JNDI by setting the
    # properties "jdbc.read.jndi.name" and "jdbc.write.jndi.name". Note that
    # these settings, though separate, are a copy of the default settings with
    # the newly overridden values.
    #

    #
    # Oracle
    #
    jdbc.default.driverClassName=oracle.jdbc.OracleDriver
    jdbc.default.url=jdbc:oracle:thin:@//172.17.0.3:1521/ORCLPDB1.localdomain
    jdbc.default.username=LIFERAY72
    jdbc.default.password=LIFERAY72

##
## Module Framework
##
    #
    # Gogo Shell listen (ip:port)
    #
    module.framework.properties.osgi.console=11311
At this point we re-launch the Gradle createDockerfile task, but specify the environment using the parameter -Pliferay.workspace.environment=docker (blade gw clean createDockerfile -Pliferay.workspace.environment=docker). This time the contents of the build/docker directory will also contain our configurations.
build/docker
├── Dockerfile
├── deploy
└── files
    ├── portal-ext.properties
    └── tomcat
        ├── lib
        │   └── ext
        │     └── ojdbc8.jar
        └── webapps
            └── ROOT
                └── WEB-INF
                    └── lib
                        └── liferay-portal-database-all-in-one-support-1.1.3.jar
Note that this step (the execution of the Gradle task createDockerfile) is not typically needed. I’m just using this command so I can see what will be used for the Docker image without actually creating the image yet.
4. Build and run the Docker image
At this point we can proceed with the build of our Docker Liferay 7.2 image with support for the Oracle database. The Gradle buildDockerImage task does just that.
$ blade gw clean buildDockerImage -Pliferay.workspace.environment=docker
The figure below shows the output of the Gradle task execution, while the following figure shows the details of the image just created.

Figure 1 – Output of the gradle buildDockerImage task
As you can see from figure 2, the docker environment is used as a tag of our image (liferay-72-oracledb-docker-images:docker).

Figure 2 – Output of the command docker image ls
All that remains is to start our image and we can do it with the command to follow. The docker command makes sure to expose ports 8080 (web) and 11311 (Gogo Shell). It also makes sure to use the volume to allow us to easily deploy our applications, just copy the bundles into the $(pwd)/build/docker/deploy directory.
$ docker run -d -it --name Liferay72-Oracle -p 8080:8080 -p 11311:11311 -v $(pwd)/build/docker:/etc/liferay/mount -P liferay-72-oracledb-docker-images:docker
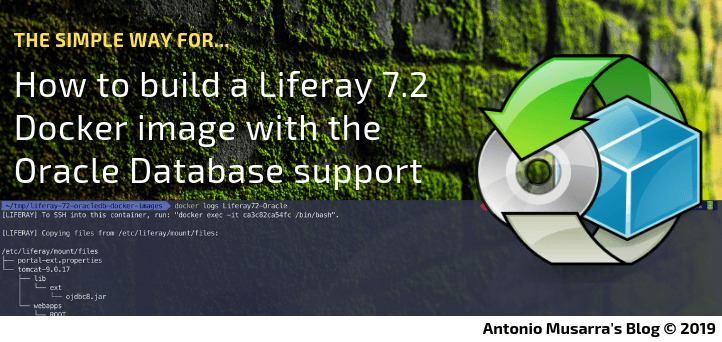
To view the Liferay logs you need to run the command docker logs -f Liferay72-Oracle. The Docker command to access the machine is shown on the log.

Figure 3 – Output of the Liferay log file
You can monitor the status of our container using the docker ps command. Figure 4 shows the status and which TCP / IP ports are exposed.
Figure 4 – Output of the command docker ps
Figure 5 shows the Oracle schema populated with Liferay tables at start-up.

Figure 5 – Get Liferay portal version from RELEASE_ table
Docker has become increasingly popular in today’s development lifecycle, by providing an automated way to package software and its dependencies into a standardized unit that can be shared cross-platform.
You can now manage Liferay’s Docker images in Liferay Workspace and push your Docker custom image on Docker Hub or other registry 😉 !


