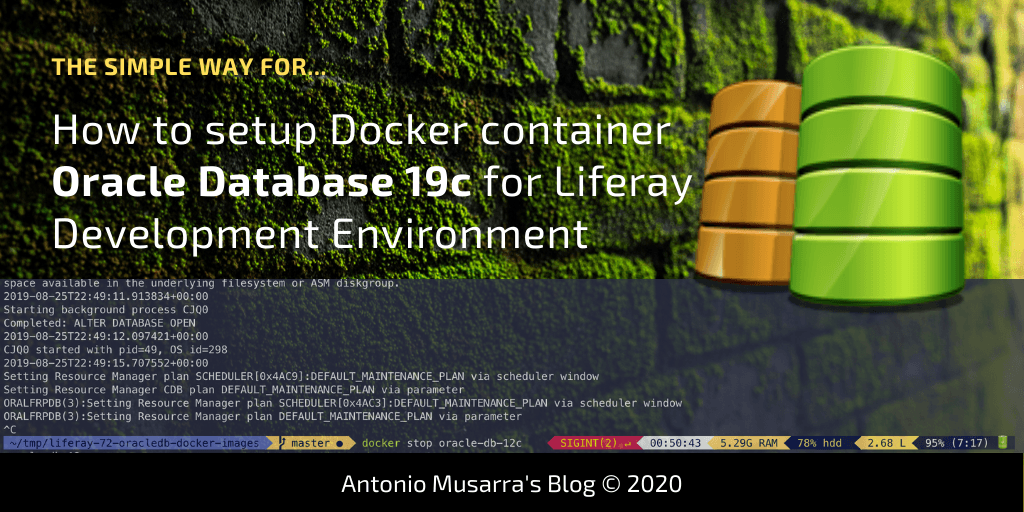
(English) How to setup Docker container Oracle Database 19c for Liferay Development Environment
In the previous article How to setup Docker container Oracle Database 12c for Liferay Development Environment we saw how to create an Oracle 12c Docker container for our Liferay Development Environment. In this article we will see how to get an Oracle 19c Docker container that we could later use to host the Liferay database.
The following documents (see database section) provide details of the configurations that are certified by Liferay (pay attention to support for Oracle 19c). You can see the complete documents on Liferay Portal.
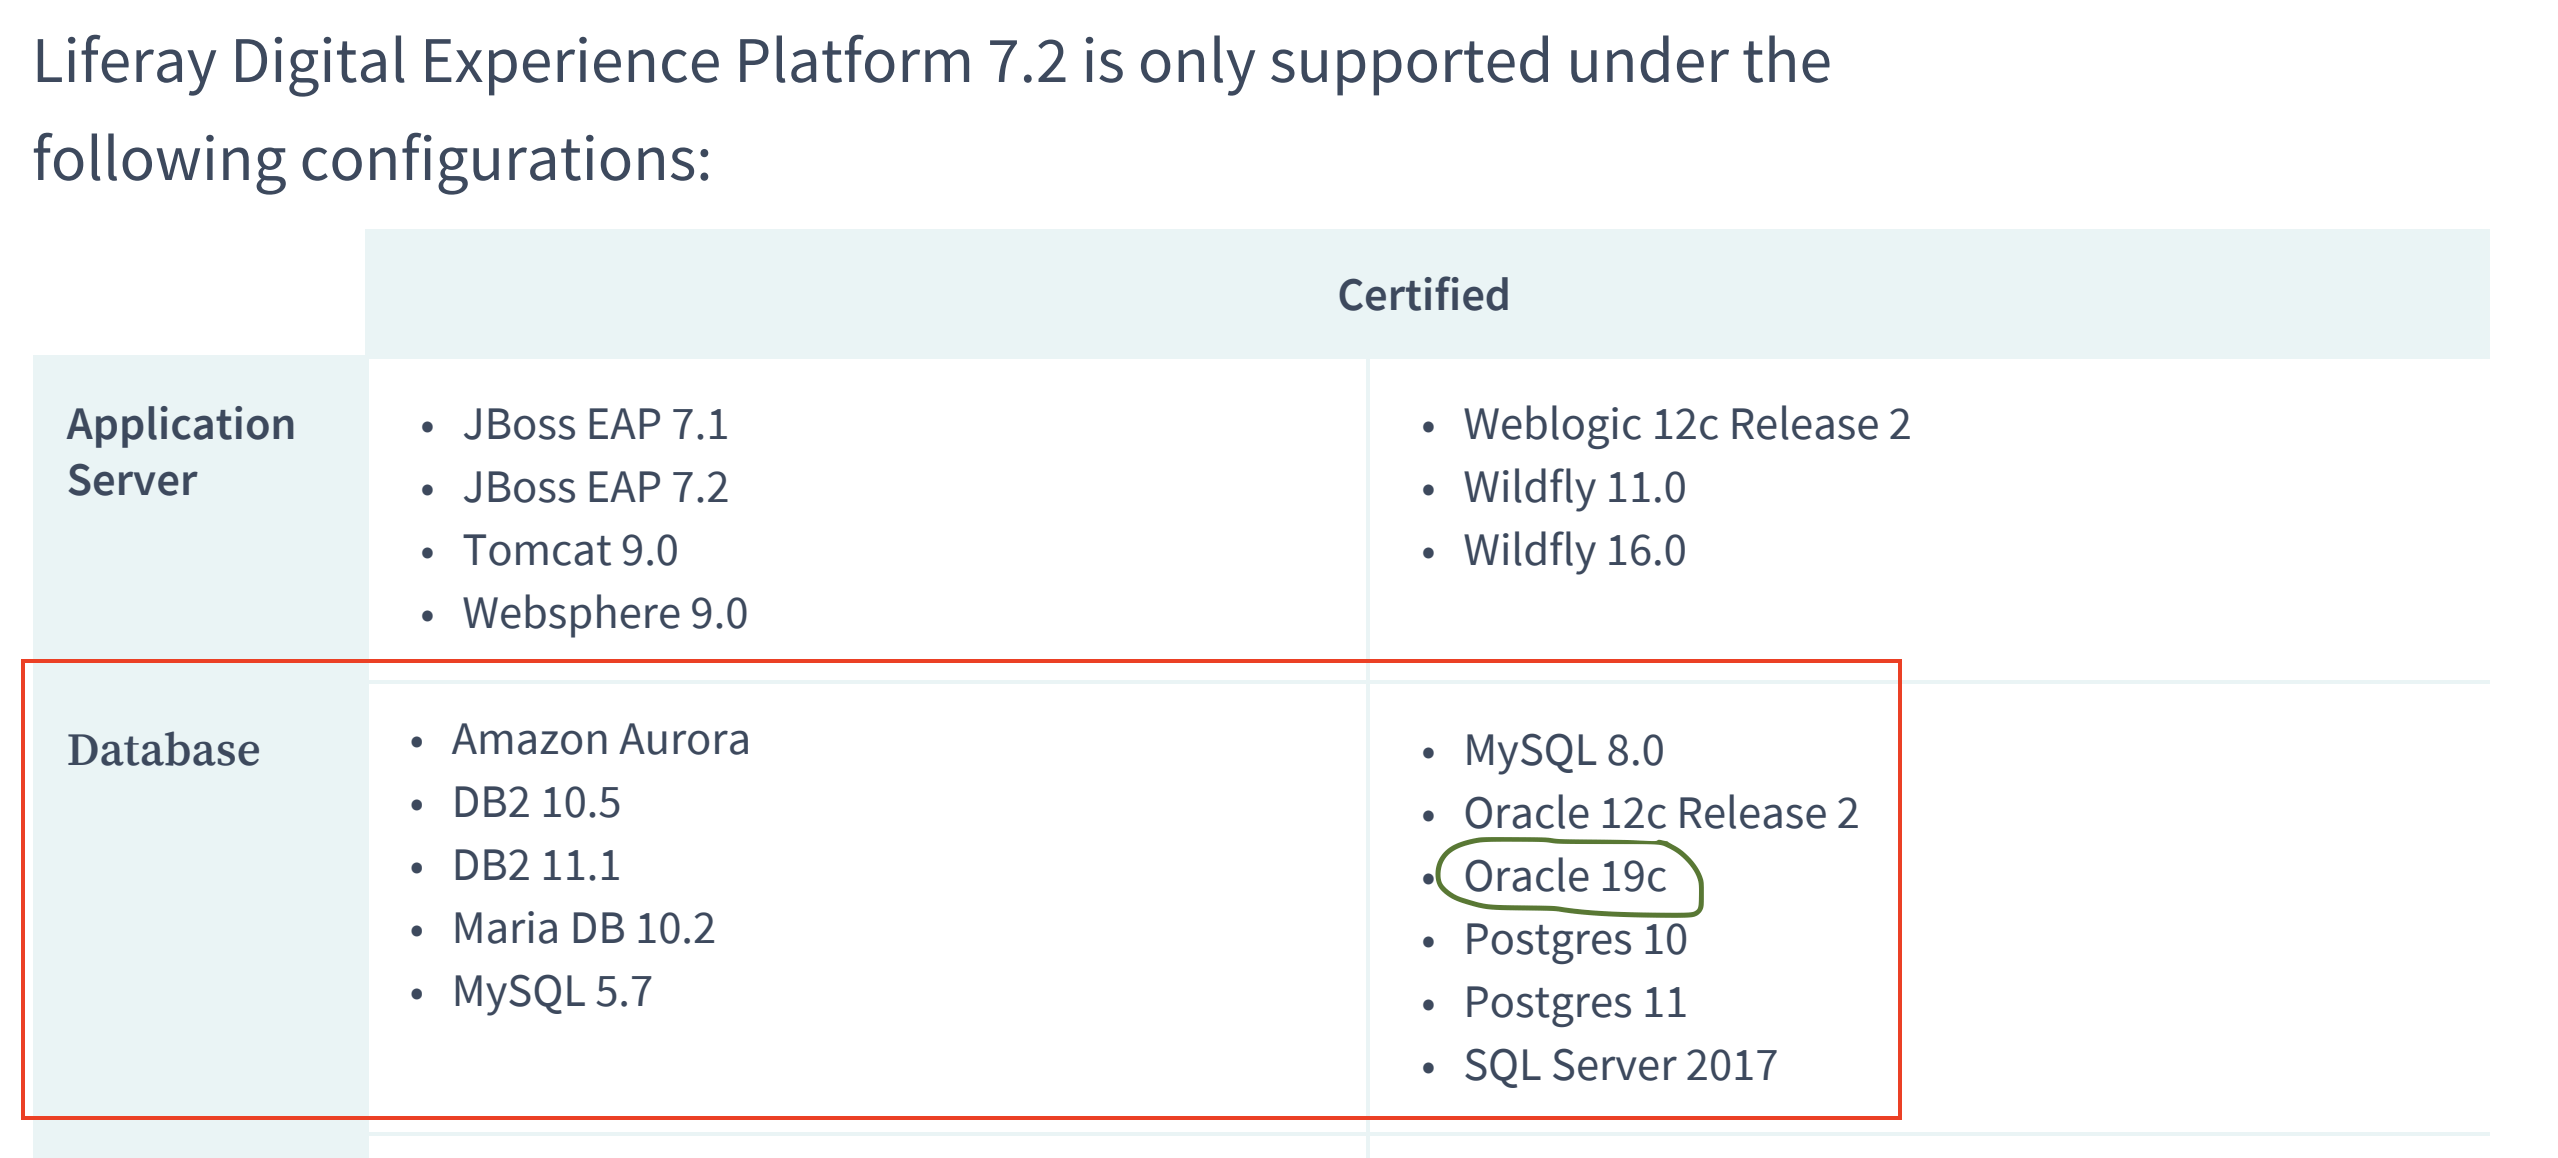
Liferay 7.2 Compatibility Matrix Database Section
I also recommend reading the article How to build a Docker Liferay 7.2 image with the Oracle Database support.
1. What are the requirements
Before proceeding with the Docker container setup, let’s see what the requirements are.
- You need to install or update Docker on your PC. Refer to this article for how to install Docker on Windows;
- You must have configured Docker with at least 2 CPUs;
- You must have configured Docker with at least 6GByte of the memory;
- You must have configured Docker with at least 15GByte of free storage for Docker.
The docker versions on which I have successfully run the Oracle Docker container are: 17.x, 18.x and 19.x. The version of Docker Engine (Community Edition) that I will refer to in this article is 19.03.5 (you can check version with command docker version).
What is shown in this article can be performed on Windows, Unix-like operating systems. In my case I use macOS. However, always refer to the documentation of Docker and Oracle for what concerns the minimal requirements that the target system must have.
2. Oracle Database 19c Docker Image
For some years now, Oracle Database Enterprise Edition 12c is available as an image in Docker Store. Unfortunately Oracle 19c is not available on the Docker Store, but this is not a problem, you can build the Oracle 19c Docker image yourself.
The GitHub oracle/docker-images repository contains everything needed to build Docker images of some of the Oracle products and in particular the Oracle Database. This project on GitHub offers sample Dockerfiles for:
- Oracle Database 19c (19.3.0) Enterprise Edition and Standard Edition 2
- Oracle Database 18c (18.4.0) Express Edition (XE)
- Oracle Database 18c (18.3.0) Enterprise Edition and Standard Edition 2
- Oracle Database 12c Release 2 (12.2.0.2) Enterprise Edition and Standard Edition 2
- Oracle Database 12c Release 1 (12.1.0.2) Enterprise Edition and Standard Edition 2
- Oracle Database 11g Release 2 (11.2.0.2) Express Edition (XE)
The project README contains all the information necessary for building and running the Oracle Docker image. In case you would like to know more, I invite you to read the article Oracle Database 19c com Docker published by Alex Zaballa on the Oracle Technology Network (OTN) blog.
Very well! Once we get our Oracle 19c Docker image, we can go on: running the Docker image and configuring for Liferay.

Docker image built from the Oracle GitHub project.
3. How to starting an Oracle Database Server instance
This Oracle database server image uses Docker data volumes to store data files, redo logs, audit logs, alert logs and trace files. The data volume is mounted inside the container at /opt/oracle/oradata. To use a directory on the host system for the data volume and SQL Scripts, I created the ~/OracleData/19c/data and ~/OracleData/19c/scripts/setup directory.
docker run -d -it --name oracledb-19c \
	-p 1521:1521 \
	-e ORACLE_SID=ORALFRDEV \
	-e ORACLE_PDB=ORALFRDEVPDB \
	-e ORACLE_PWD=LwB_27i5Wi8=1 \
	-v /Users/antoniomusarra/OracleData/19c/data:/opt/oracle/oradata \
	-v /Users/antoniomusarra/OracleData/19c/scripts/setup:/opt/oracle/scripts/setup \
	oracle/database:19.3.0-ee
The docker run command starts the database with the following features:
- Assign the container the name oracledb-19c
- Exposes the TCP/IP SQL Net port 1521
- Through the environment variables
- Set the SID to ORALFRDEV
- Set the PDB to ORALFRDEVPDB
- Set sysdba password to LwB_27i5Wi8=1
- Configure volume usage
- ~/OracleData/19c/data:/opt/oracle/oradata: The data volume to use for the database. Has to be writable by the Unix “oracle” (uid: 54321) user inside the container! If omitted the database will not be persisted over container recreation.
- ~/OracleData/19c/scripts/setup:/opt/oracle/scripts/setup: A volume with custom scripts to be run after database setup.
Obviously you can customize the values of the start parameters to your liking, these are the ones I usually use for my development environment.
Inside the ~/OracleData/19c/scripts/setup directory are the SQL Scripts (that be run after database setup) needed to create tablespaces, user and grants for Liferay. Following the contents of the file 01_liferay_tablespace.sql, 02_liferay_user.sql, 03_liferay_grant_user.sql.
-- Change session to Pluggable DataBase (PDB)
ALTER SESSION SET container = ORALFRDEVPDB;

-- Create tablespace for schema Liferay 7.2 GA2
CREATE TABLESPACE liferay_dev_72_ga2_data logging DATAFILE
'/opt/oracle/oradata/ORALFRDEV/ORALFRDEVPDB/liferay_dev_72_ga2_data.dbf' SIZE 64m
autoextend ON NEXT 32m maxsize 4096m blocksize 8k EXTENT management local;

--Create temp tablespace for Liferay 7.2 GA2
CREATE TEMPORARY TABLESPACE liferay_dev_72_ga2_temp tempfile
'/opt/oracle/oradata/ORALFRDEV/ORALFRDEVPDB/liferay_dev_72_ga2_temp.dbf'
SIZE 64m autoextend ON NEXT 32m maxsize 2048m blocksize 8k
EXTENT management local;
-- Change session to Pluggable DataBase (PDB)
ALTER SESSION SET container = ORALFRDEVPDB;

-- Create user for new schema Liferay Dev
CREATE USER liferay_dev IDENTIFIED BY liferay_dev DEFAULT TABLESPACE
liferay_dev_72_ga2_data TEMPORARY TABLESPACE liferay_dev_72_ga2_temp PROFILE
DEFAULT account unlock;
-- Change session to Pluggable DataBase (PDB)
ALTER SESSION SET container = ORALFRDEVPDB;

-- Assign grant to Liferay User
GRANT CONNECT TO liferay_dev;
GRANT RESOURCE TO liferay_dev;
GRANT UNLIMITED TABLESPACE TO liferay_dev;
In this case I created the tablespaces to host the schema for my Liferay Portal 7.2 CE GA2 development environment. I invite you to read the article Liferay Portal 7.2 CE GA2: Update Oracle Database Driver.
You can monitor the start of the container by viewing the logs or using the docker command below.
$ docker logs -f oracledb-19c
$ docker ps --format 'table {{.Names}}\t{{.Image}}\t{{.Status}}\t{{.Ports}}' -f name=oracledb-19c
The first start of the Oracle 19c container will take a few minutes because the whole database setup process must be performed. Here you could see the Docker Container Oracle Database 19c Log of the first boot. The figure below shows the output of the docker ps command. You can see the status of the container indicating that it is ready (healthy) for use and port 1521 is exported.

Checking the Oracle Docker Container Status
The following figure shows the execution of the SQL scripts after the Oracle database setup. These scripts will not be executed on subsequent container starts.

Executing the SQL Scripts for Liferay
Following is the structure of the OracleData directory after starting the Oracle container.
~/OracleData/19c $ tree ✔ 16:29:29 5.81G RAM 89% hdd 3.31 L 100% 🔋
.
├── data
│ ├── ORALFRDEV
│ │ ├── ORALFRDEVPDB
│ │ │ ├── liferay_dev_72_ga2_data.dbf
│ │ │ ├── liferay_dev_72_ga2_temp.dbf
│ │ │ ├── sysaux01.dbf
│ │ │ ├── system01.dbf
│ │ │ ├── temp01.dbf
│ │ │ ├── undotbs01.dbf
│ │ │ └── users01.dbf
│ │ ├── control01.ctl
│ │ ├── control02.ctl
│ │ ├── pdbseed
│ │ │ ├── sysaux01.dbf
│ │ │ ├── system01.dbf
│ │ │ ├── temp012020-03-15_14-15-40-714-PM.dbf
│ │ │ └── undotbs01.dbf
│ │ ├── redo01.log
│ │ ├── redo02.log
│ │ ├── redo03.log
│ │ ├── sysaux01.dbf
│ │ ├── system01.dbf
│ │ ├── temp01.dbf
│ │ ├── undotbs01.dbf
│ │ └── users01.dbf
│ └── dbconfig
│ └── ORALFRDEV
│ ├── listener.ora
│ ├── orapwORALFRDEV
│ ├── oratab
│ ├── spfileORALFRDEV.ora
│ ├── sqlnet.ora
│ └── tnsnames.ora
└── scripts
├── setup
│ ├── 01_liferay_tablespace.sql
│ ├── 02_liferay_user.sql
│ └── 03_liferay_grant_user.sql
└── startup
At this point we have our Oracle Database 19c ready to host the Liferay Portal database.
4. Connection Test
At this point we are in a position to perform a connection test to the new scheme using a tool such as Oracle SQLDeveloper. The following figures show the configuration of the database connection, the view of the Liferay tables and the status of the tablespaces created for Liferay.
The parameters to connect to the new Liferay scheme are:
- Username/password: liferay_dev/liferay_dev
- Hostname: localhost
- Service Name: ORALFRDEVPDB

Configuring connection to the Oracle database via SQL Developer

View Liferay Tables on Oracle Database 19c

View of the Liferay Tablespace
Conclusions
In this article I wanted to show you how I usually configure my development environment when I need to have an Oracle Database to be later connected to Liferay. As you have seen, using Docker makes this all very simple and fast. Other useful resources. Do not hesitate to contact me with any questions and I hope this article has been helpful.
- How to build a Docker Liferay 7.2 image with the Oracle Database support
- How to build a Docker Liferay 7.2 image with the SQL Server 2017 Database support
- Liferay 7.1: How to add support for Oracle DB
- Come installare Liferay 7 su JBOSS EAP con il supporto Oracle Database
- Liferay 7 Wildfly: How to add support for Oracle DB (video on Antonio Musarra’s Blog YouTube Channel)
- Liferay 7 Community Edition GA5 & Oracle 12c via Docker Composer (video on Antonio Musarra’s Blog YouTube Channel)
- Come installare Liferay 7 su JBoss EAP con il supporto per Oracle Database (video on Antonio Musarra’s Blog YouTube Channel)


