ActiveMQ Artemis: Easy Docker Creation also for ARM
For some time I have been carrying out projects that revolve around the IoT (Internet Of Things) ecosystem using SBC (Single Board Computers) such as the Raspberry Pi. Within the IoT ecosystem, the Message Broker is one of those components, I would say fundamental, which enable communications between the "pieces of iron".
The MQTT protocol is in fact the king of machine-to-machine (M2M) connectivity, which has become increasingly popular with the evolution and popularization of IoT concepts. The MQTT protocol can be thought of as a lightweight and simplified analog of AMQP, also based on the publish/subscribe model, but it provides a much smaller network footprint and can be used by small devices with limited computing capacity.
There are many Open Source and Paid MQTT Message Brokers available for use, such as:
Apache ActiveMQ is one of the most popular Open Source, multi-protocol, Java-based Message Broker. It supports industry standard protocols so users get the benefits of client choices across a wide range of languages and platforms. There are currently two "versions" of ActiveMQ: the "classic" 5.x broker and the "next generation" Artemis broker for event-driven messaging applications. When Artemis reaches a sufficient level of parity of functionality with code base 5.x, it will become ActiveMQ 6.
In my projects I usually use RabbitMQ (but also CloudAMQP) and Apache ActiveMQ. I recently started experimenting with Apache ActiveMQ Artemis installed as Message Broker on Raspberry Pi.
In this article I want to show you how to build your own Apache ActiveMQ Artemis Docker image for ARM platforms and consequently run on Raspberry Pi.
1. Where to start?
We start by going to the home page of the ActiveMQ Artemis project, and then from here, we immediately point to the Easy Docker Creation section.
ActiveMQ Artemis provides some simple scripts to start working with Docker. To make it possible to generate your Docker images also for ARM platforms, about two weeks ago I had the opportunity to make a contribution to the ActiveMQ Artemis project, extending the artemis-docker module.
Before going further, let's see what the requirements are:
- git is optional. In case you can download the project in zip format from GitHub;
- JDK 8 or 11. It is recommended to create your own Docker SNAPSHOT images using JDK 11 for the build of the sources, since the artemis-docker module allows you to create Docker images for ARM starting from the AdoptOpenJDK 11 image;
- Maven 3.x is optional. In case you can use the Maven wrapper (mvnw) included within the project;
- Docker 19.x/20.x;
- Docker Buildx. For Docker versions from 19.03, buildx is included, it is not necessary to install it separately;
- Repository on Docker Hub where to host the Docker images that we are going to create. It is then necessary to facilitate the installation of the Docker image created on your Raspberry Pi.
So let's start by running the clone of the ActiveMQ Artemis project. For our purpose we can also clone the project's Git repository without taking all the history with us: git clone --depth 1 https://github.com/apache/activemq-artemis.git
2. Let's create our Docker image
Thanks to the artemis-docker module, we have a number of options to get different Docker images:
- create the Docker image for the official release of ActiveMQ Artemis;
- create the Docker image for local distribution, that is, for the SNAPSHOT version obtained from the source build;
- create the Docker image based on CentOS and Debian images with Java 8;
- build the Ubuntu based Docker image with Java 11 in the AdoptOpenJDK implementation;
- create the Docker image for ARM (ARMv7 / ARM64).
The readme.md of the artemis-docker module clearly describes how to pursue the options listed above. We will focus on how to create the Docker image for ARM, both for the official release of ActiveMQ Artemis and for the SNAPSHOT version, the latter useful in order to test the new features before the release of the official version.
The creation of the Docker image for ARM for the SNAPSHOT version involves the following steps. The current version of SNAPSHOT (at the time of this article's publication) is 2.18.0.
- Clone of the Artemis ActiveMQ repository.
- Build the project to get the SNAPSHOT distribution.
- Preparing Docker files for local deployment.
- Docker image build for ARM and push to Docker Hub repository.
The build time of the project is variable depending on the computing power of your machine, for example, on my Mac Book Pro (Mid-2017) i7-7660U with 16GByte of RAM it is about 5 minutes (without running of unit tests). The Docker image build operation spends the most time in push and pull operations, and this depends on the connectivity you have available to the internet.
In case you don't have good network connectivity, you might run into errors like this:
- failed to compute cache key: failed commit on ref "layer-sha256:f60421c1f": failed size validation: 2292149 != 24043427: failed precondition
- net/http: TLS handshake timeout
- failed to copy: unexpected status: 504 Gateway Time-out
The commands necessary to satisfy the four steps described above are indicated below.
# 1. Clone the repository
$ git clone --depth 1 https://github.com/apache/activemq-artemis.git

# 2. Build of the project
$ cd activemq-artemis

# If you want skip the test use the -DskipTests argument
$ mvn clean install

# 3. Prepare the Docker file
$ cd artemis-docker
$ ./prepare-docker.sh --from-local-dist --local-dist-path ../artemis-distribution/target/apache-artemis-2.18.0-SNAPSHOT-bin/apache-artemis-2.18.0-SNAPSHOT

# 4. Build the Docker image for ARM. You should replace the {your-username} and {your-repository-name} placeholders with your values
$ cd ../artemis-distribution/target/apache-artemis-2.18.0-SNAPSHOT-bin/apache-artemis-2.18.0-SNAPSHOT
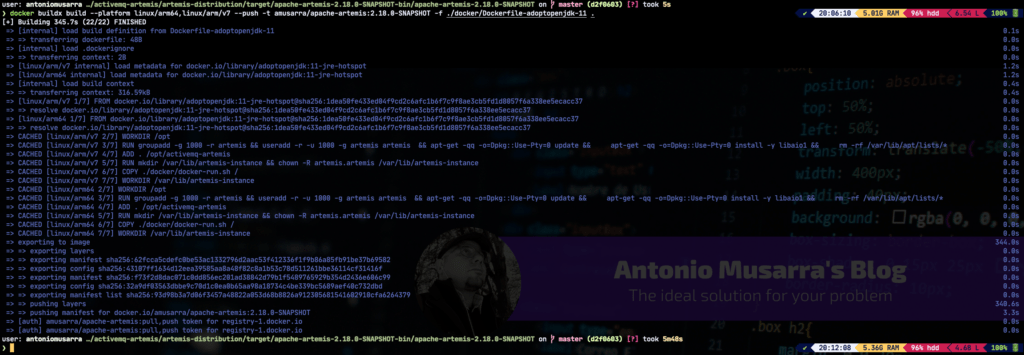
$ docker buildx build --platform linux/arm64,linux/arm/v7 --push -t {your-username}/{your-repository-name}:2.18.0-SNAPSHOT -f ./docker/Dockerfile-adoptopenjdk-11 .
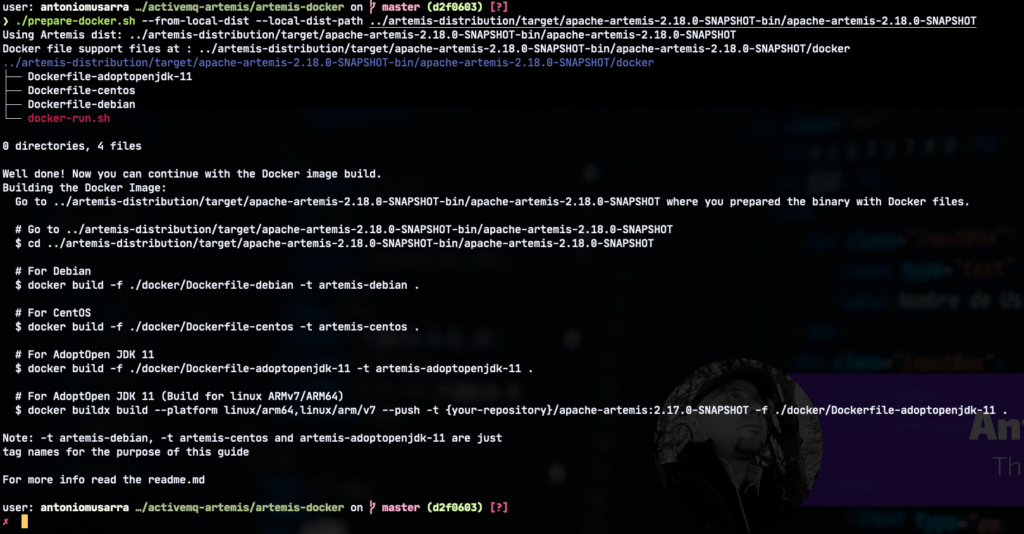
If the execution of the prepare-docker.sh script (step 3) is successful, you should see on the screen when shown in the following figure, that is, the scripts (Docker files and scripts for running the container) that have been created within the docker directory which in turn is located within the ActiveMQ Artemis distribution directory, you will also find useful information to continue with the build of the Docker image.
For the Docker image build command (step 4), you should replace the {your-username}/{your-repository-name} placeholders with your values. In my case this translates to amusarra/apache-artemis.
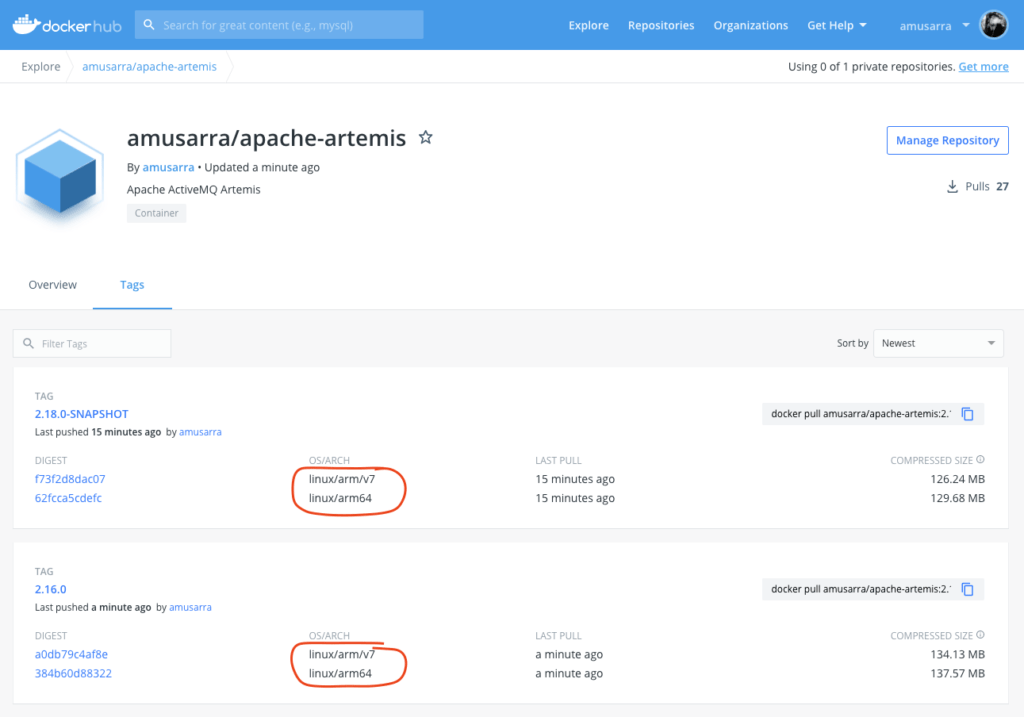
After performing step 4, you should see the image of ActiveMQ Artemis version 2.18.0-SNAPSHOT on your Docker Hub repository. The figure below shows in particular the contents of my amusarra/apache-artemis repository.
If we wanted to prepare the Docker image of ActiveMQ Artemis version 2.16.0 (the current release version) instead, the steps are reduced to two:
- preparation of Docker files for the release version (in this case 2.16.0);
- build Docker image for ARM and push to your Docker Hub repository.
# 1. Prepare the Docker file
$ cd artemis-docker
$ ./prepare-docker.sh --from-release --artemis-version 2.16.0
# 2. Build the Docker image for ARM
$ cd _TMP_/artemis/2.16.0
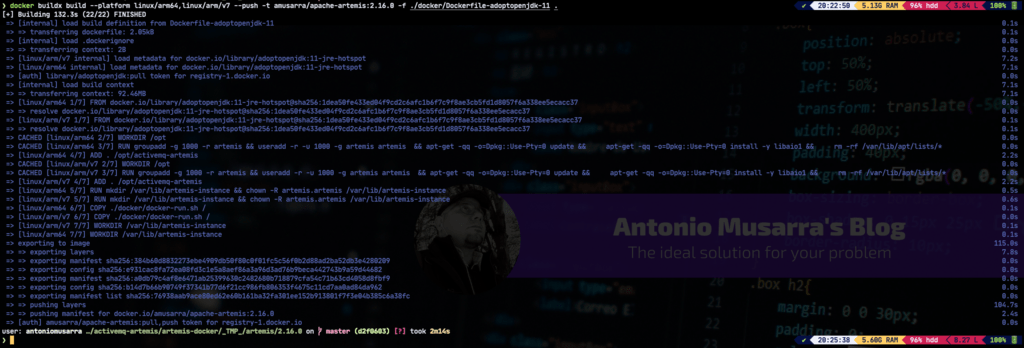
$ docker buildx build --platform linux/arm64,linux/arm/v7 --push -t {your-username}/{your-repository-name}:2.16.0 -f ./docker/Dockerfile-adoptopenjdk-11 .
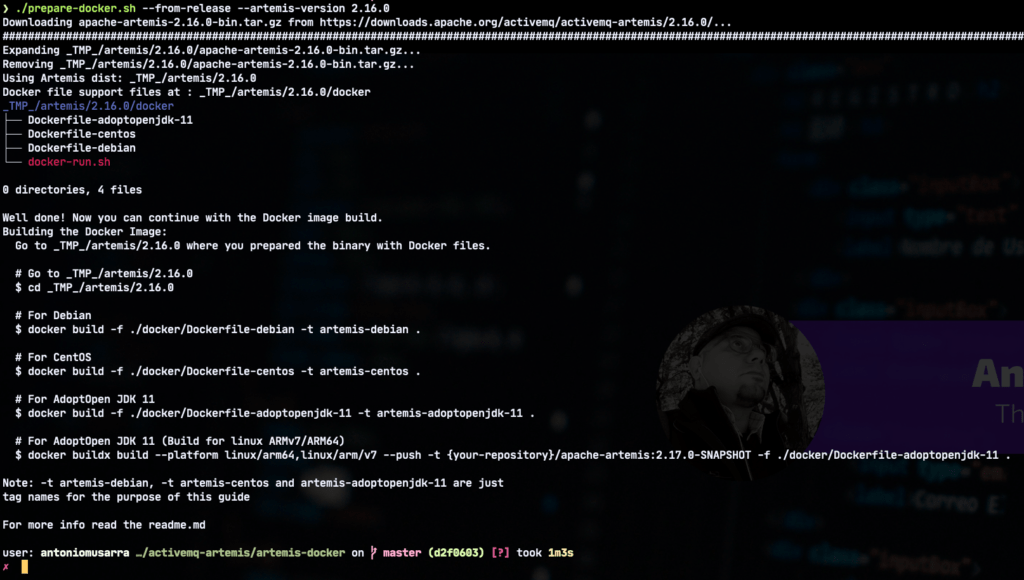
The figure below shows the output of the prepare-docker.sh script which, unlike the first run, downloads the version 2.16.0 of ActiveMQ Artemis and then shows the scripts (Docker files and scripts for running the container) that are created within the docker directory (which in turn is contained within the _TMP_ /artemis/2.16.0/ docker directory), also shows useful information to continue with the build of the Docker image.
At this point you should have ActiveMQ Artemis version 2.16.0 and 2.18.0-SNAPSHOT on your Docker Hub repository.
3. Raspberry Pi: Pull e Run
Finally here we are! Are you ready to pull the image from our Docker repository and then get a container running an instance of ActiveMQ Artemis?
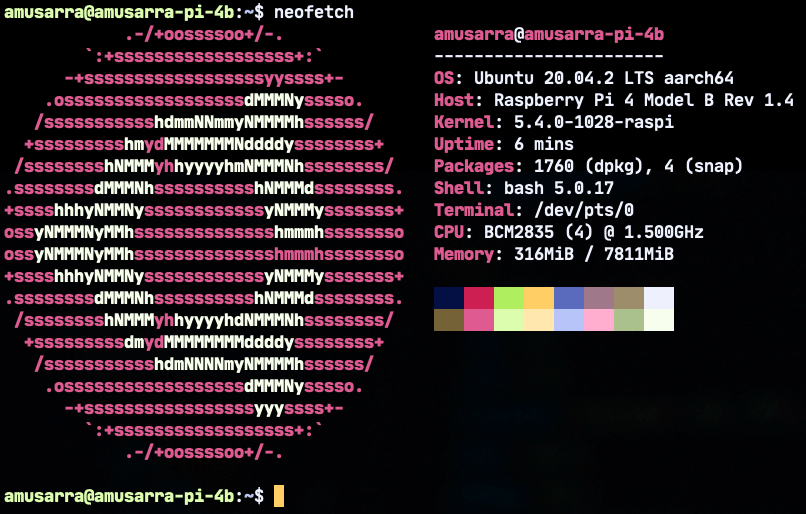
Before proceeding we have to fulfill a requirement: Docker 19.x / 20.x must be correctly installed on the Raspberry Pi. Regarding the Raspberry Pi model, I recommend version 4 and the model with at least 4GByte of RAM memory. In my case I have a Raspberry Pi 4 with 8GByte of RAM, Ubuntu 20.04.02 LTS operating system and Docker 20.10.3.
Once the requirements are met, it is possible to pull and run the Artemis ActiveMQ container using the following commands. We pull both versions of Docker images, even if we're going to use version 2.16.0 later.
# 1. Pull the Docker Images of the ActiveMQ Artemis (2.16.0 and 2.18.0-SNAPSHOT)
$ docker pull amusarra/apache-artemis:2.18.0-SNAPSHOT
$ docker pull amusarra/apache-artemis:2.16.0
# 2. Run the ActiveMQ Artemis 2.16.0
$ docker run --rm -d --name activemq-artemis-2160 -p 61616:61616 -p 8161:8161 -p 1883:1883 amusarra/apache-artemis:2.16.0
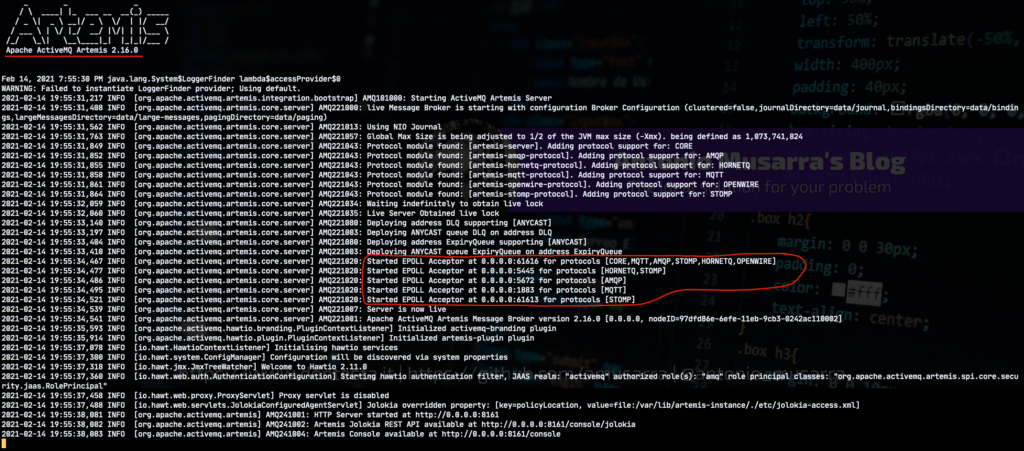
In the container execution command, we specify which TCP / IP ports should be exported to the outside, in this case: console (8161), MQTT (1883) and Multi-Protocol [CORE, MQTT, AMQP, STOMP, HORNETQ, OPENWIRE] (61616).
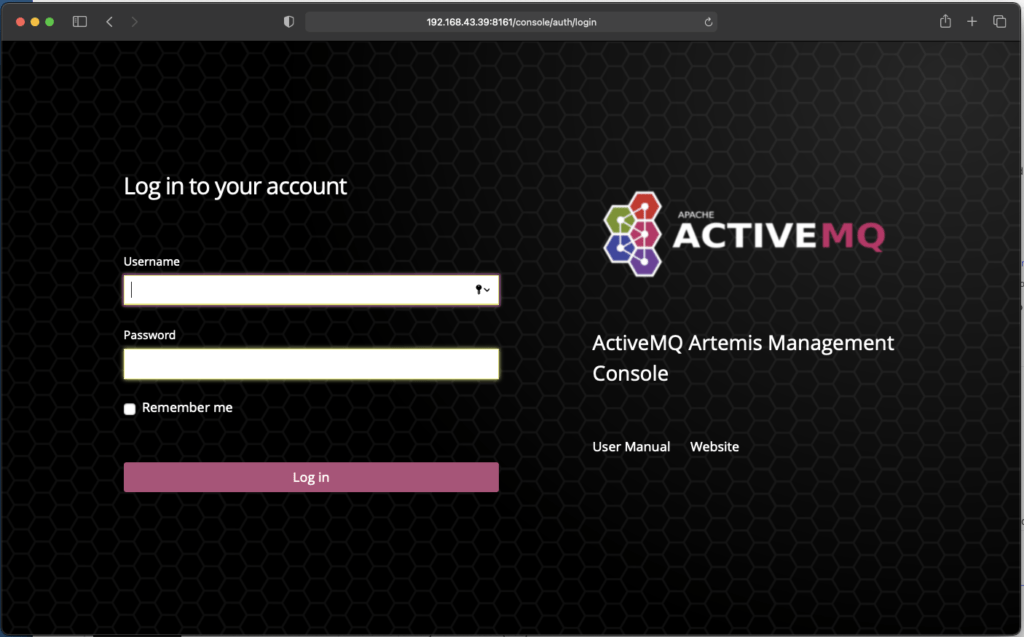
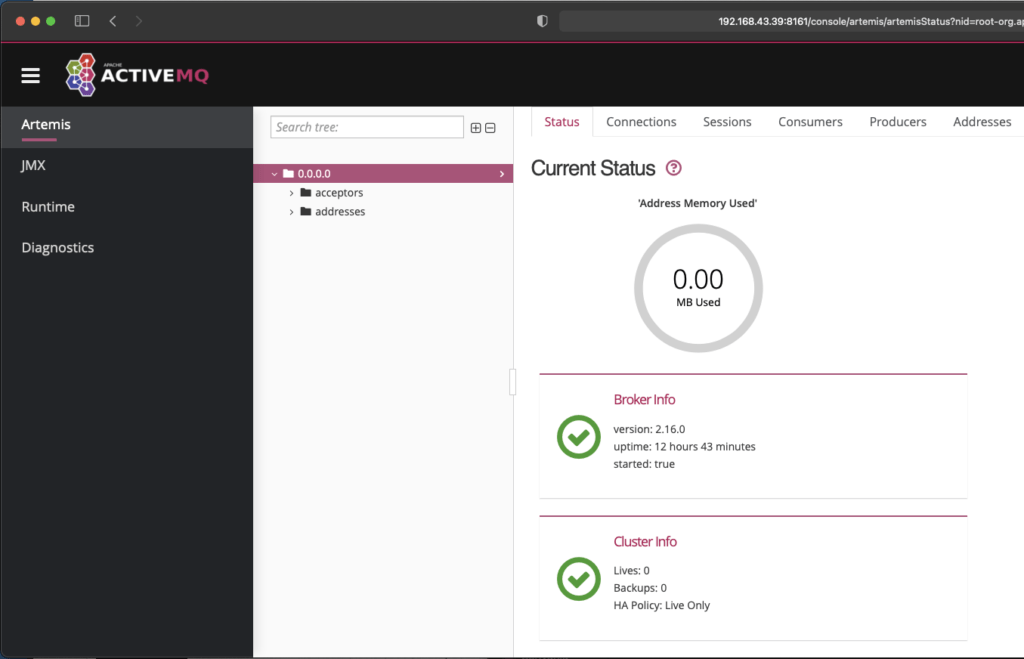
The figure below shows the logs of the Artemis ActiveMQ container just started successfully. The other figures show access to the Artemis ActiveMQ administration panel, whose login credentials (by default) are artemis/artemis.
4. A very fast but effective test
Now that we have set up our Message Broker based on Artemis ActiveMQ on the Raspberry Pi, let's try to do a simple test which consists of:
- create a topic where a producer will send a message (in JSON format) containing the CPU temperature;
- create a producer that reads the CPU temperature every 5 seconds and sends the value read on the previously created topic;
- subscribe to the topic to read the published values.
We will call the topic with the name RPI4.cpu-temp that we will create using the first command to follow. The next command is instead the one responsible for reading the CPU temperature every 5 seconds and publishing in the message on the newly created topic. Both commands make use of the artemis binary which is part of the server management tools.
# 1. Create the topic RPI4.cpu-temp
$ docker exec -it activemq-artemis-2160 \
/bin/bash ./bin/artemis queue create --user artemis --password artemis \
--address RPI4 --anycast --durable --purge-on-no-consumers \
--auto-create-address --name cpu-temp

# 2. Send CPU Temperature on the topic RPI4.cpu-temp
$ while true; \
do docker exec -it activemq-artemis-2160 \
/bin/bash ./bin/./artemis producer --clientID rpi4 --destination topic://RPI4.cpu-temp --message "$(echo -n '{"cpu-temperature":'; cat /sys/class/thermal/thermal_zone*/temp | sed -e 's/\(.\)..$/.\1/'; echo -n '}')" --message-count 1 --user artemis --password artemis; \
sleep 5; \
done
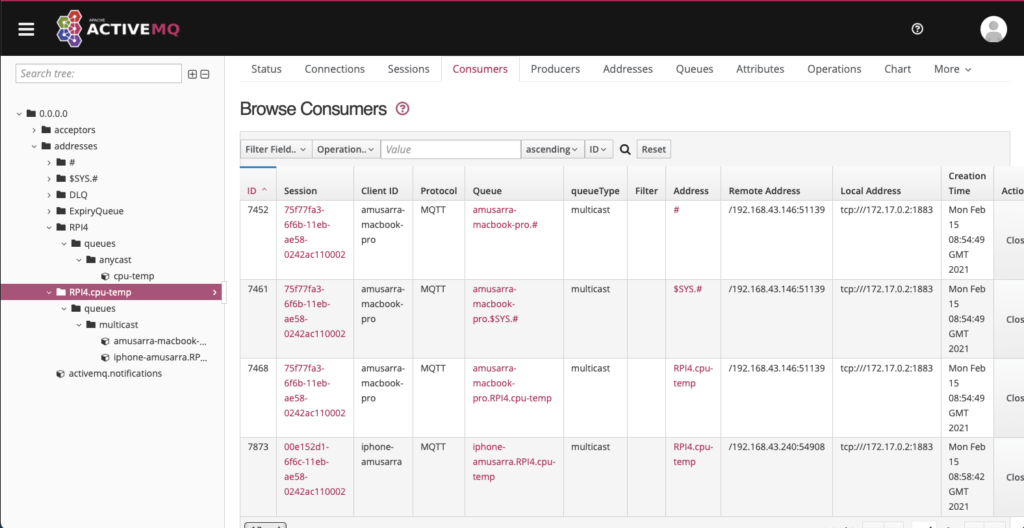
The figure below shows the post message command on the RPI4.cpu-temp topic in action. By accessing the Management Console, it is possible to see some detailed information regarding the number of sessions, the number of connections and see which are the current consumers of the topic.
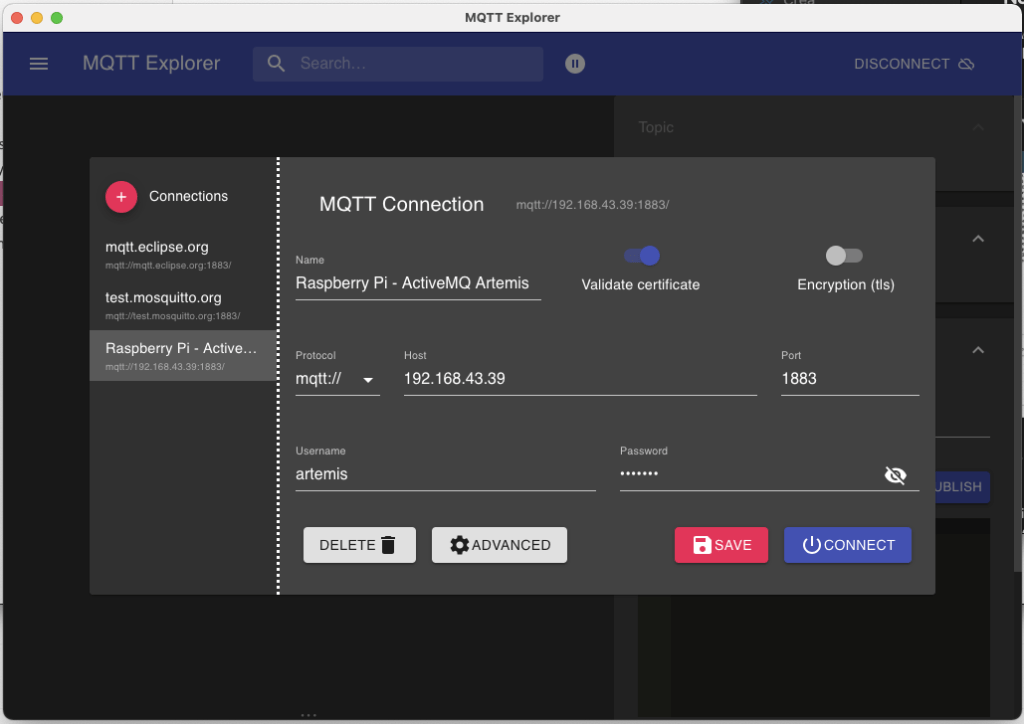
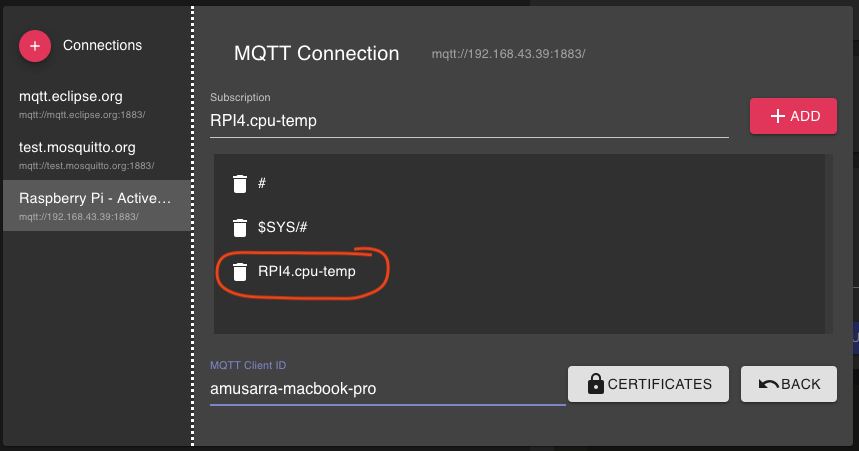
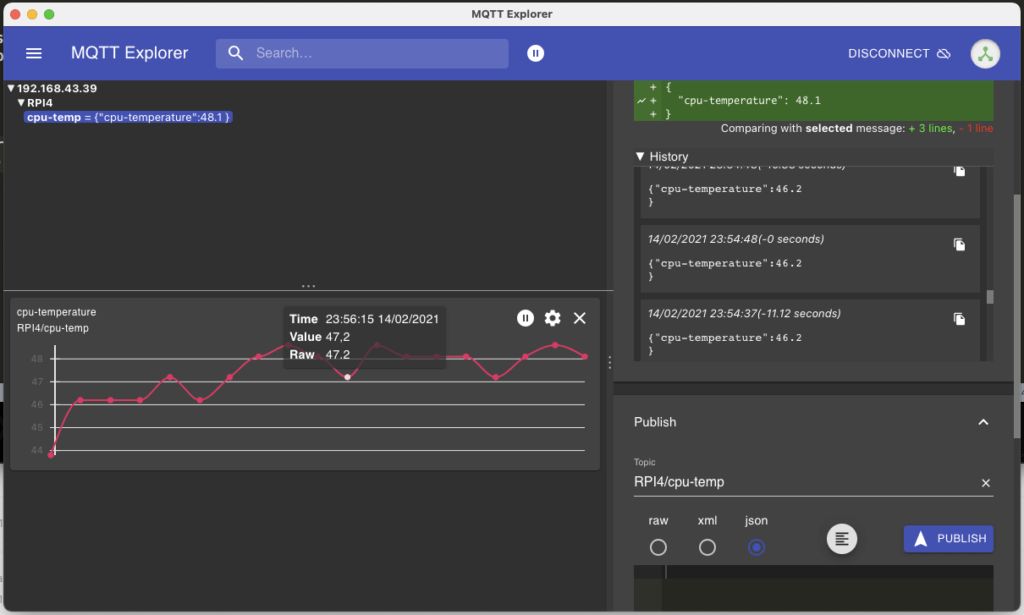
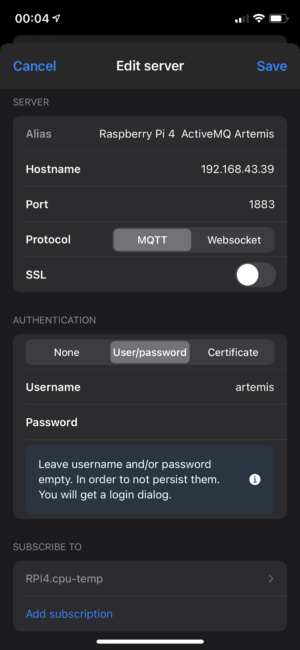
To subscribe to the topic RPI4.cpu-temp in order to be able to read the CPU temperature values, we could for simplicity use a very common MQTT client. In my case I used the MQTT Explorer application on macOS, the figures relating to the configuration of the connection to the Message Broker and the display of the data received, also in graphic form, are shown below.
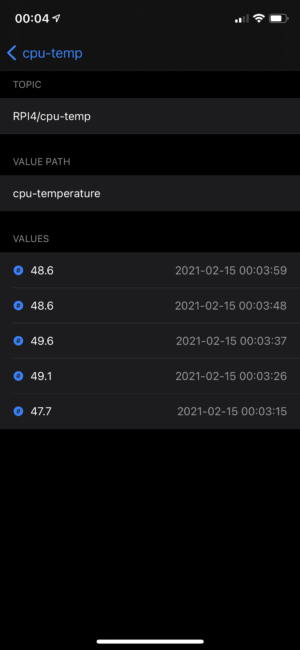
On my iPhone I used the MQTT Analyzer app but there are still similar apps for the Android platform, such as MQTT Terminal. The figures below show some screenshots of the app as it reads the values from the RPI4.cpu-temp topic.
At this point I would say that we can be satisfied with the result obtained. With this Message Broker the possible applications in the IoT field are truly countless, space for imagination.
5. Resources
Below I leave you a series of resources that are useful for in-depth analysis.
- Home del progetto ActiveMQ Artemis (https://activemq.apache.org/components/artemis/)
- Easy Docker Creation (https://github.com/apache/activemq-artemis/tree/master/artemis-docker)
- Apache ActiveMQ Artemis Documentation (https://activemq.apache.org/components/artemis/documentation/)
- Raspberry PI Sense HAT: Come pubblicare i dati su CloudAMQP via MQTT
- Raspberry Pi: Come eseguire un Docker Container Apache Karaf 4.2
- Docker: How to create Apache Karaf images for ARM and ARM64
- Internet of Things with Raspberry Pi 3 (https://www.packtpub.com/product/internet-of-things-with-raspberry-pi-3/9781788627405)
- Practical Python Programming for IoT (https://www.packtpub.com/product/practical-python-programming-for-iot/9781838982461)
6. Conclusions
Did you think it was so easy to install Apache ActiveMQ Artemis even on ARM hardware architectures?
You thought it was so easy to install Apache ActiveMQ Artemis on ARM hardware architectures?
Thanks to the partnership between Docker and ARM (see Docker announced a partnership with ARM) announced in April 2019, today we were able to run the ActiveMQ Artemis Docker container on the Raspberry Pi linux/arm architecture.
Thanks to buildx (from Docker) we can then create multi-arch images for both ARM and x86 using Docker. Thanks to the buildx tool, we were able to prepare the Artemis ActiveMQ image for linux/arm64 and linux/arm/v7 which we then used to install the multi-protocol Message Broker service on the Raspberry Pi.
