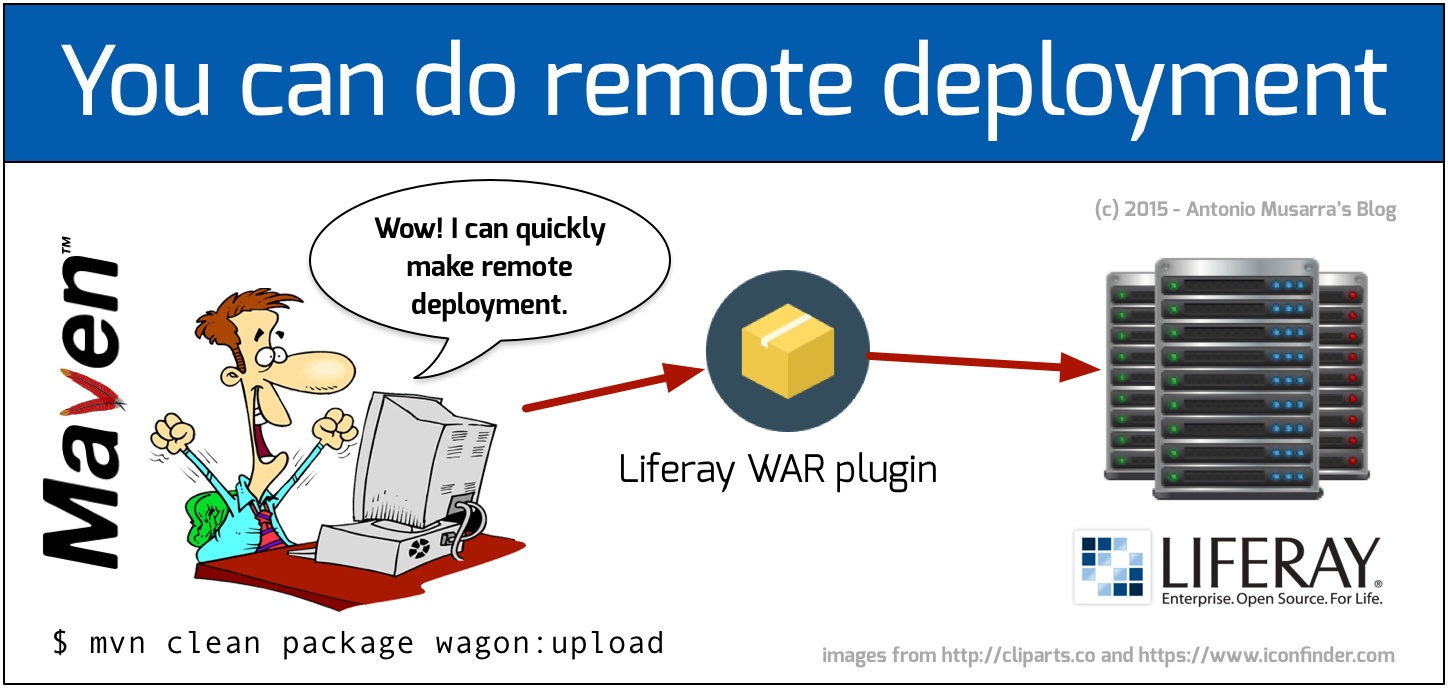
Liferay Maven: How do the remote deployment of the plugins
How to make the installation of Liferay plugins on remote development server? There are several ways to perform this operation and the choice of either mode of operation is usually influenced by the context in which the project is developed.
In this article we will see a possible solution for remotely deploying the artifact of a Liferay project based on the maven. Maybe someone will think, why not use the remote connector supplied with the IDE Liferay? Good question and answer immediately:
- The current stable version of the IDE 2.2.x supports only the bundle based on tomcat;
- Personally I do not want to be tied to the IDE development but I want to be free to access an "ugly black console" to do the task of deployment.
Liferay has a few days ago released the first milestone of the M1 3.0.0 version of its IDE and support for the long-awaited version 7 of Liferay introduced new remote connectors.
We leave the comfort of the IDE and throw our eyes in front of the console taking ready our fingers on the keyboard.
The development environment is based on Liferay 6.2 (EE v. 6.2.10.15) and maven 3.3.x while the remote server on which to install the project is the Liferay 6.2 bundle JBoss. The remote server is based on Unix / Linux operating system accessible via the network through the SSH protocol.
In case of difficulty in the practical application of the post does not hesitate to describe the problems encountered by a comment to this post.
1. Creating the sample plugin
I would say to start from scratch, so we have to create a example plugin with the environment maven and Liferay ready and those of you who have read the book Sviluppo Liferay con Maven will know how to create a Liferay plugin through maven.
We create a portlet type plugin and proceed to do it by running the command shown in the maven console MavenCreatePluginPortletOutup.txt 1 whose output is available on the gist.
mvn -B archetype:generate \
  -DarchetypeRepository=$HOME/.m2/repository \
  -DarchetypeArtifactId=liferay-portlet-archetype \
  -DarchetypeGroupId=com.liferay.maven.archetypes \
  -DarchetypeVersion=6.2.10.15 \
  -DartifactId=login-sample-portlet \
  -DgroupId=it.dontesta.labs.liferay.portlets \
  -Dversion=1.0.0-SNAPSHOT
Console 1 - Creating a portlet type plugin by maven plugin
On completion of the maven command we will have our plugin portlet (login-sample-portlet) with a structure like the one shown in the console 2.
└── login-sample-portlet
    ├── pom.xml
    └── src
        └── main
            ├── java
            ├── resources
            └── webapp
                ├── WEB-INF
                │   ├── liferay-display.xml
                │   ├── liferay-plugin-package.properties
                │   ├── liferay-portlet.xml
                │   ├── portlet.xml
                │   └── web.xml
                ├── css
                │   └── main.css
                ├── icon.png
                ├── js
                │   └── main.js
                └── view.jsp
Console 2 - Structure of the portlet plugin created by maven.
We recall that our goal is to do deploy the plugin on a remote instance of Liferay and the only files on which to act to achieve the goal is the pom.xml.
2. Maven configuration for remote deployment
With a tool like Maven is practically possible to do everything and perhaps even coffee. Thanks to the plugin system we can achieve our aim of remote deployment with no effort, just pure configuration. We begin to get some data which will then be useful to the configuration of the maven plugin.
- ip address, or FQDN hostname of the remote machine (in my case ip 192.168.43.226)
- full path to the installation of Liferay bundle JBoss (in my case /home/liferaydev/liferay-portal-6.2-ee-sp14)
- username and password to access the remote server
The plugin maven wagon-maven-plugin (or wagon) is what will allow you copy the WAR of our portlet on the remote server and then the hot deployment of Liferay (of which I recommend reading the hot deployment versus auto deploy) will carry out the actual installation. Listing 1 shows the wagon plugin configuration included within the plugins section of our project pom.
<build>
  <plugins>
    <plugin>
	<groupId>org.codehaus.mojo</groupId>
	<artifactId>wagon-maven-plugin</artifactId>
	<version>1.0</version>
	<configuration>
	     <fromDir>${project.build.directory}/</fromDir>
	     <includes>*.war</includes>
	     <url>scp://${jboss.deploy.username}:${jboss.deploy.password}@${jboss.deploy.hostname}/</url>
	     <toDir>${jboss.deploy.liferay.dir}</toDir>
	</configuration>
        <dependencies>
		<dependency>
			<groupId>org.apache.maven.wagon</groupId>
			<artifactId>wagon-ssh</artifactId>
			<version>2.8</version>
		</dependency>
	</dependencies>
    </plugin>
   </plugins>
</build>
Listing 1 - Configuring the wagon plugin for remote deployment
Listing 1 contains references to the maven properties whose values are used by the wagon plugin to know where to copy the portlet WAR, in particular:
- project.build.directory: maven project property that identifies the directory where to find the WAR file, the latter the result of the build process. The default value of this property is the target.
- jboss.deploy.username: username to access the remote server.
- jboss.deploy.password: password to access the remote server.
- jboss.deploy.hostname: hostname, IP address or FQDN of the remote server.
- jboss.deploy.liferay.dir: full path of the remote server to deploy directory.
There are two ways to set these properties, using the maven command line by specifying the property name and value as a system property, or by defining the properties and the values directly on the pom inside the properties section.
In the console 3 it is show how to pass values of properties through maven command while Listing 3 shows the properties defined at the level of pom.
mvn -Djboss.deploy.username=liferaydev \
  -Djboss.deploy.password=liferaydev \
  -Djboss.deploy.hostname=192.168.43.226 \
  -Djboss.deploy.liferay.dir=/home/liferaydev/liferay-portal-6.2-ee-sp14/deploy \
  <goal>
Console 3 - Setting properties via command line configuration
A good rule is to define the default values of properties in the pom, and if you need to change the default value of some properties, you can do it from the command line takes precedence over everything.
<properties>
    <!-- Remote JBoss Liferay Bundle -->
    <jboss.deploy.hostname>192.168.43.226</jboss.deploy.hostname>
    <jboss.deploy.username>liferaydev</jboss.deploy.username>
    <jboss.deploy.password>liferaydev</jboss.deploy.password>
    <jboss.deploy.liferay.dir>/home/liferaydev/liferay-portal-6.2-ee-sp14/deploy</jboss.deploy.liferay.dir>
    <!-- End Remote JBoss Liferay Bundle -->
  </properties>
Listing 2 - Setting the properties used by the wagon plugin inside the pom
3. How to remotely deploy
Now that the pom of portlets is complete, we can proceed with the build and deployment process on the remote server, as shown in the console 4.
mvn clean package wagon:upload
Console 4 - Build and Deploy of the sample portlet on remote server
The maven command shown in console 4 performs the order: cleaning the project, build the project and creation of the war of the portlet and copy of the war on the remote server that we defined earlier.
[INFO] --- maven-war-plugin:2.2:war (default-war) @ login-sample-portlet ---
[INFO] Packaging webapp
[INFO] Assembling webapp [login-sample-portlet] in [/Users/amusarra/Documents/Articoli/MyBlog/Liferay/DeployRemoto/sources/login-sample-portlet/target/login-sample-portlet-1.0.0-SNAPSHOT]
[INFO] Processing war project
[INFO] Copying webapp resources [/Users/amusarra/Documents/Articoli/MyBlog/Liferay/DeployRemoto/sources/login-sample-portlet/src/main/webapp]
[INFO] Webapp assembled in [57 msecs]
[INFO] Building war: /Users/amusarra/Documents/Articoli/MyBlog/Liferay/DeployRemoto/sources/login-sample-portlet/target/login-sample-portlet-1.0.0-SNAPSHOT.war
[INFO] WEB-INF/web.xml already added, skipping
[INFO]
[INFO] --- wagon-maven-plugin:1.0:upload (default-cli) @ login-sample-portlet ---
[INFO] Uploading /Users/amusarra/Documents/Articoli/MyBlog/Liferay/DeployRemoto/sources/login-sample-portlet/target/login-sample-portlet-1.0.0-SNAPSHOT.war to scp://192.168.43.226///opt/liferay-portal-6.2-ee-sp14/deploy/login-sample-portlet-1.0.0-SNAPSHOT.war ...
[INFO] ------------------------------------------------------------------------
[INFO] BUILD SUCCESS
[INFO] ------------------------------------------------------------------------
[INFO] Total time: 44.493 s
[INFO] Finished at: 2016-02-08T09:22:08+01:00
[INFO] Final Memory: 38M/409M
[INFO] ------------------------------------------------------------------------
Console 5 - Part of the output of the wagon plugins that are copying on the remote server
From the remote server log files can verify the deployment process of the portlets and the final outcome or we can also verify a successful installation directly from Liferay control panel, so as shown in figure 1, while figure 2 the portlet installed page.
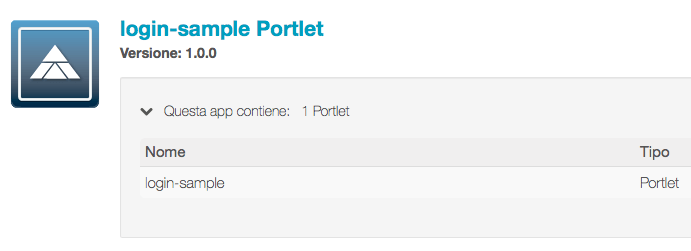
Figure 1 - Gestione Applicazioni installate su Liferay
I changed the default view.jsp created by the plugin maven Liferay so that showed the number of the plug-in version (see figure 2). On how to view the version number of a plugin I took advantage of the article published a few days ago by Marco Napolitano on his blog.

Figure 2 - Login Sample Portlet installata in pagina
4. Conclusions

In this quick post I wanted to show how simple it is to set your Liferay project, based on the maven and how to install your plugin on a remote development server. The development server examined in this post is JBoss, however, the same configuration can also be applied to developing servers based on standard Liferay bundle (Tomcat, Glassfish, Resin, Jetty).
You can leave a comment if this short post I thought it useful, or you can bring the points that I have not included and that you consider critical to do the remote deployment of Liferay plugins.